
Note: This site will be taken down July 1, 2024.
Jan's Working with Windows 10:
Dialogs: Date and Time
A dialog is a window which has places for you to make choices or to give a response. A dialog can be as simple as a two-button Yes/No box. Some dialogs have several sections on different tabs.
You have already seen the Mouse Properties dialog.
You will practice using the Date/Time dialog to make changes to Windows.

Date/Time Dialog
If you are sharing a computer, do not forget to undo any changes you make that might cause problems for others!
[Note: if you are on a network or are using a classroom computer, you may not be able to make changes, your changes may not be saved when you log off, or they may be lost when the computer is restarted.]
Time Zone Clashes
Pay close attention to the time and date on your computer. New computers may come set to the time zone where they were manufactured instead of yours.
Computers on a network may show the 'wrong' time zone because the company or school has locations in different time zones.
Example: The community college that I taught in had 5 campuses in Eastern Time and in 2 Central Time. All of the school's computers were set to Eastern time by the IT department. I taught at a campus that was in Central Time and most of my students lived in Central Time. Confusing!
It was doubly confusing when they had to submit documents online through the course management software, which used Eastern Time. Did the instructor set the deadline in Eastern Time or was it in Central Time? Midnight Eastern is only 11:00 pm in Central. Some of my night-owl students waited until the last minute (or so they thought) and found that the Submit button would no longer work!
| |
Step-by-Step: Date and Time Dialog |
|
| What you will learn: |
to show screen tips to see the two styles of dialogs to use the different types of input in dialogs: slide switch command button drop list palette of choices spin box check box to change the time and date to close a dialog |
Start with: ![]() with
Desktop and Taskbar showing.
with
Desktop and Taskbar showing.
Screen Tips
Screen tips are often available for icons and buttons.
-
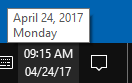 Move your cursor over the date and time in the notification area and let it hover there a few seconds.
You will see the full date pop up in a screen tip. -
 Experiment: Screen Tips
- Move your pointer over other things on the Taskbar and on the Desktop to see if they have a popup message for you.
-
 Hover over the Taskbar button for an open application and a
popup thumbnail of each window appears. The illustration shows three Word windows. Thumbnails can be quite useful!
Hover over the Taskbar button for an open application and a
popup thumbnail of each window appears. The illustration shows three Word windows. Thumbnails can be quite useful!
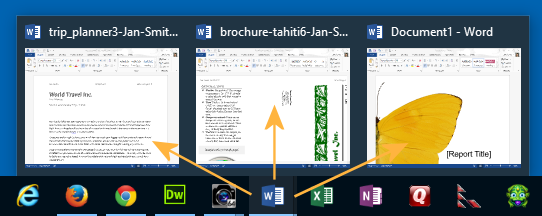
For some programs, only separate windows get a thumbnail. For example, if a current major browser ( Edge, Internet Explorer, Firefox, or Chrome) has several tabs open in a single window, only the active tab will show as a thumbnail.
Settings Dialog: Date & time
Since all computers have a small battery inside to keep the clock running, even when unplugged, the time should not be off much unless the battery is getting old. (Or someone has been playing around!)
But, the Time Zone can be off if you moved or got a new computer that was built in a different time zone.
If the computer doesn't have the right date or time, neither will your document's creation and modification dates or an Insert Date command.
![]() Don't leave a Date and Time dialog
open while you work!
Don't leave a Date and Time dialog
open while you work!
It is entirely too easy to accidentally change the computer's date and/or time without realizing it.
 Win 10 before Anniversary Update:
 Click the date/time on the Taskbar.
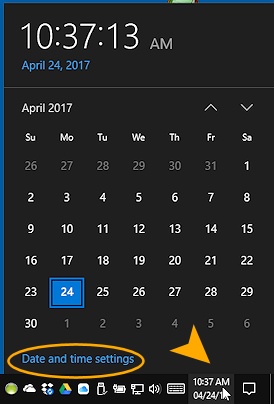
A calendar and clock appear.
This view is great for checking the date of next Monday or the day of the week of August 1 next year.
The blue extended date under the time looks like a link but does not seem to do anything.You cannot change the time are date here.
Click on 'Date and time settings' below the calendar in the popup.
 Win10 after Anniversary Update - 1607:
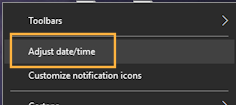
Right click the date/time in the Taskbar. A context menu appears. Click on Adjust date/time.
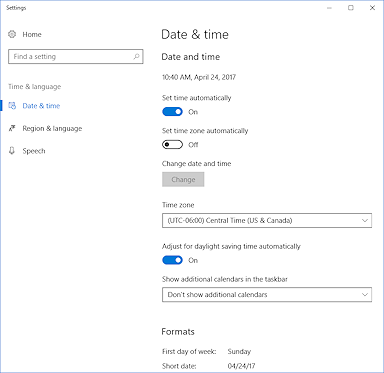 A Settings dialog opens to the Date & time page. This dialog uses the new Modern/Metro style that is optimized for touch.
 This page shows three types of input controls: slide switch, command button, and drop list.
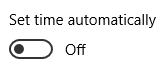
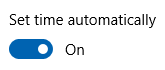
Slide Switch:
Click in the slide switch for 'Set time automatically'.
The default is On, so the switch should be Off now. The Change button no longer has grey text. With automatic time changes off, you can now make changes manually.There may be a slight delay before the switch changes and the button becomes active. You will see the default Busy icon instead of the usual arrow pointer shape.
-
Command Button:
Click on the button Change.

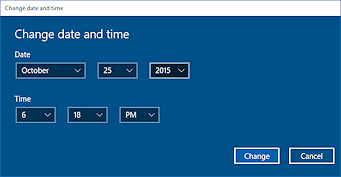 A dialog opens on top of the Settings dialog, Change date and time.
This dialog has drop lists that make it easy to change the month, day, year, hour, minute, and AM/PM.
Let's not mess with the computer's date and time just yet! This dialog does not show us how to get the correct date and time, but we will see a way shortly - IF your computer is connected to the Internet.
-
Command Button:
Click on the Cancel button to close this dialog and return to the previous one. -
Drop List:
Click on the drop list Time zone.
New behavior: The list does not drop down from the bottom of the control or expand up from its top. Instead the list expands around the current item, as it appears in the list.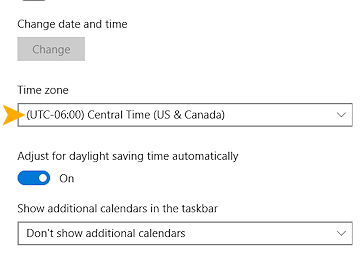
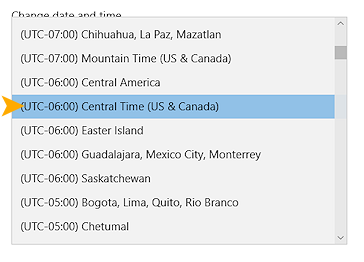
This list shows more zones than usual! There are often several names with the same time. Those are for different countries.
In the illustration there are five times zones for UTC -06:00. Other times may have even more names than this.
UTC stands for Coordinated Universal Time, which is a modern time standard similar to the old GMT (Greenwich Mean Time). The abbreviation was picked to be usable by all languages.
- Click somewhere outside the list but within the dialog to close the drop list, unless you really do need to change the time zone.
-
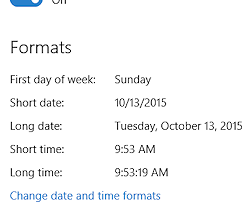 Scroll to the bottom of the dialog.
There are several formats that you can set.
-
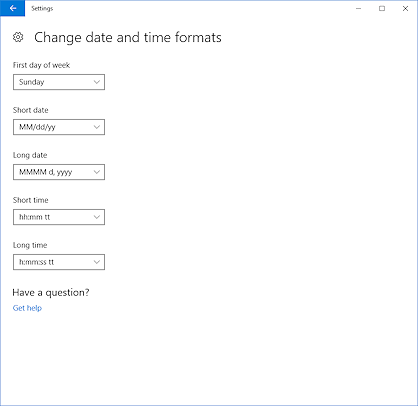
Click on Change date and time formats.
-
Click on the various drop lists to see what the options are.
Whoops. Most seem to be in code!Examples of what the codes mean:
Code: Produces: Short date M/d/yyyy 4/6/2015 Short date MM/dd/yy 04/06/15 Long date MMMM d, yyyy April 6, 2015 Long date dddd, d MMMM, yyyy Monday, 6 April, 2015 Short time hh:mm tt 07:30 PM Long time H:mm 19:30 Two of the same letter means you will see a leading zero for single digit numbers, like 04 for April or 07:08 for eight minutes after seven o'clock.
Four of the same letter mean the value will be spelled out completely for a month or day, like October or Monday, and will have 4 digits for a year like 2015.
An upper case H for hour means you will see 24-hour time, also called military time, like 14:10 for ten minutes after 2 in the afternoon.
- Click on the Back arrow at the top of the dialog window to return to the previous page.
Control Panel Dialog: Date and Time
Most of these choices are also in the Settings dialog for Date & time but not all.
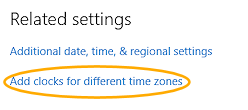 Click on "Add clocks for different time zones".
The
Date and Time dialog from the Control Panel appears. If necessary, click on the tab 'Date and Time'.
From the Date and Time tab you can change the date, time, or time zone.
The tab Additional Clocks lets you display other time zones.
The tab Internet Time lets you synchronize your computer's clock with an official time clock.
 Command button: Click the button "Change date and time..."
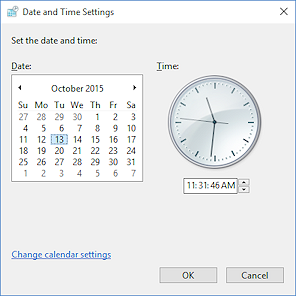
The Date and Time Settings dialog appears.
Changes here affect the whole computer and all of the installed programs.-
Experiment ONLY if you are connected to the Internet to get back to the correct date and time.
How to change the date:
Change the Day: Click the desired date in the calendar for the month.
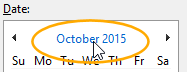 Change the
Month: Click left
Change the
Month: Click left  or right
  arrow at the top of the calendar to scroll one month.
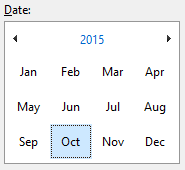
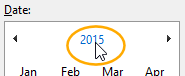
To see a palette of all 12 months at once, click on the month-year text.Click on the month you want.
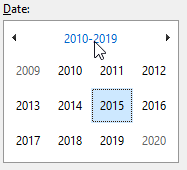
 Change the Year: Click on the year above the set of months.
A palette of years appears.Click on the year you want.
The arrows at the top move the set of years. You should not need to change the year by much unless the computer has been turned off for a really long time!
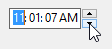
How to change the time:
In the spin box, type in a time or select part of the time and click the spin arrow to change the values. The spin arrows will only affect one part of the time at a time. As you change the values, the clock face will change to match.- Click on OK to close this dialog and go back to the Date and Time dialog.
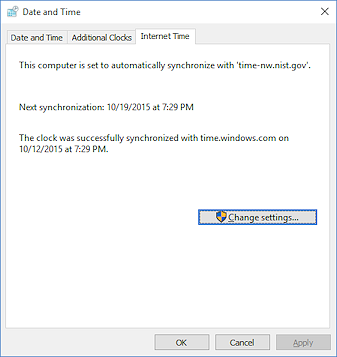
Internet Time Tab: Correct Time and Date
The Internet Time tab is VERY helpful. This tab is how you can get an accurate date and time after someone (was it you?) messes with the computer's date and time.
You MUST be connected to the Internet for this fix!!
 Click the tab Internet Time.
This tab tells you three things:
- Synced or Not: Whether or not the computer will automatically synchronize the time with a standard clock at Microsoft or at NIST (National Institute of Standards and Technology). Of course, you must be connected to the Internet for this to happen. The default schedule is to update the clock will weekly.
- Next: When the next scheduled time for syncing is.
- Most recent: When the computer time was last successfully synced.
-
 Click the button Change settings...

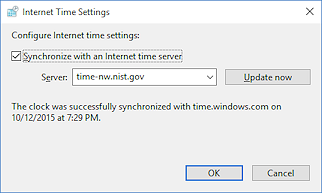
The dialog Internet Time Settings opens. - Check box: If necessary, click the check box 'Synchronize with an Internet time server'.
The Server text box and Update now button are now available (not grayed out). You can pick a server from the drop list. - Command button: Click the button Update now.

The computer contacts the server named in the box and gets the current date and time.Error: If you get an error message, the server may be too busy right now. Try again. Or, pick a different one from the Server drop list and then try again.
- Click on OK to close the Internet Time Settings dialog.
You are returned to the Date and Time dialog.
Accept Changes or Not?
There are several ways to get out of this dialog. Do you have any unsaved changes? Those would only be changes made after you last clicked the Apply button.
![]() Check the Apply button: If the Apply button is grayed out (not available), you do not have any unsaved changes to worry about!
Check the Apply button: If the Apply button is grayed out (not available), you do not have any unsaved changes to worry about!
- Mouse:
- Title bar button: Click the Close button
 to close without saving new changes.
- Command button: Click the OK button
 to close and save new changes.
 - Command button: Click the Cancel button
 to close without saving new changes.
- Title bar button: Click the Close button
 Keyboard: Use the Tab key
  to move from
part to part of the dialog. When the button that you want is selected (highlighted with a color
change or surrounded with a dashed box), press the ENTER key.
to move from
part to part of the dialog. When the button that you want is selected (highlighted with a color
change or surrounded with a dashed box), press the ENTER key.
- Verify that the time and date are correct.
Make corrections, if necessary!! - Use one of the methods above to close the dialog, depending on whether or not you need to keep changes.
| © 1997-2018 Jan Smith All Rights Reserved |
Site Map What's New |
Privacy Policy Terms of Service Copyright Acknowledgements |
~~ 1 Cor. 10:31 ...whatever you do, do it all for the glory of God. ~~
Last updated: September 23, 2018