
Note: This site will be taken down July 1, 2024.
Jan's Working with Words
Images: Clip Art
The term clip art means images that are made for inserting into documents. These can be drawings or photos, though most people probably still think of drawings first.
In the olden days, before computers, if you wanted to include an image in a document, you actually had to clip out the picture from a sheet of images using a sharp knife or scissors and paste it onto the paper page with real glue. A printing service would then use a photo process to print your document. Awkward, messy, and difficult to get just what you wanted.
Today's computer methods for including clip art in documents are a breeze in comparison... and you don't have to handle sharp objects or get sticky fingers!
Step-by-Step: Clip Art |
|
| What you will learn: | to search for clip art to insert clip art to format an image from the ribbon, Mini-Toolbar, context menu to resize an image to adjust white space to make the document one page |
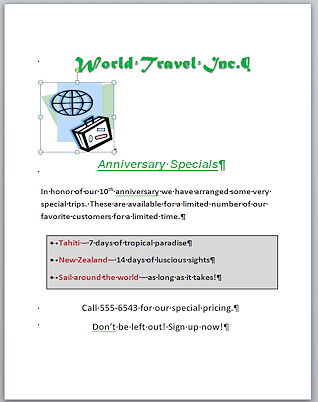
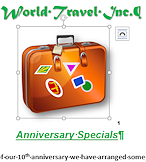
Start with:![]() , flyer-World Travel
Inc-Lastname-Firstname.docx (as finished in last lesson)
, flyer-World Travel
Inc-Lastname-Firstname.docx (as finished in last lesson)
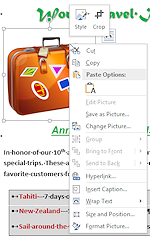
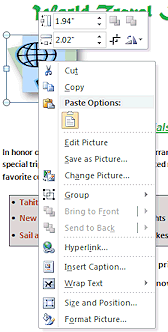
![]() Selected image and formatting: When you insert an image, it remains selected until you click elsewhere.
While an image is selected, there are many commands that are not available
or will seem to
fail because they cannot be applied to the image. Those 'failed' commands may be applied later to any text that
you type next to the image. This can be quite a surprise!
Selected image and formatting: When you insert an image, it remains selected until you click elsewhere.
While an image is selected, there are many commands that are not available
or will seem to
fail because they cannot be applied to the image. Those 'failed' commands may be applied later to any text that
you type next to the image. This can be quite a surprise!

 Word 2007, 2010: Search for Image with Clip Art Pane
To help you find the right image quickly, you need to use the right keyword(s) in the Clip Art pane. Too many words may restrict the results too much. Search for the Clip Art Pane does not combine words into phrases. Your choices in the pane filter your results!
For images on your own computer or flash drives, you can use the Pictures button instead, which you will do later. In addition, you can go through the process to let Clip Art Organizer know where your images are. You have to add keywords yourself and assign the image to one or more categories. (Such a lot of work!)
-
 Click on line 3 of your document, which is
blank.
Click on line 3 of your document, which is
blank.
The cursor is now in that line. You will put an image on this line. This is why we saved one blank line earlier.
- From the Insert tab in the Illustrations group, click on the Clip Art button
 .
.
The Clip Art pane appears where it was the last time you closed the pane (docked or floating) and with your last search terms in the text box.
By default the pane is docked to the right edge of the window. -
 Experiment: Clip Art
- Type a term of your choice into the search box and press the ENTER key or click on the Go button.
- Make changes to the Results should be: list.
- Try
your search with and without the box checked for Include Office.com content.
- Try multiple
words.
When you are ready to continue ...
 Word 2007: An online image shows a globe icon in the
bottom left corner of the thumbnail. Word 2010: No online icon on the thumbnail.
Word 2007: An online image shows a globe icon in the
bottom left corner of the thumbnail. Word 2010: No online icon on the thumbnail. Problem: Very few results appear.
Cause 1: Are you searching for images on your hard disk (not including Office.com results)? Office 2007 and 2010 install just a few images to your hard disk. The Clip Art Pane does not look at your whole hard disk, just the images that are known to the Clip Art Organizer.
Solution: Search for online content. Check the box for Include Office.com content near the top of the pane.
Cause 2: Microsoft may not have an image that matches. Are you using multiple keywords? An unusual keyword?
Solution: Use only one keyword to see if there are any results at all. Then narrow your search by adding another keyword. - Type a term of your choice into the search box and press the ENTER key or click on the Go button.
-
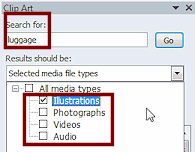 Type luggage in the Search for: text box at the top of the Clip Art pane.
- Click on the down arrow at the right end of the text box Results
should be: and have a checkmark only beside Illustrations.
"Illustration" in this case means drawings and cartoons and not photos.
- If necessary, click the box beside Include
Office.com content.
Now your search results will include online content.
-
 Click the Go button at the top right of the pane.
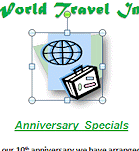
Images on the hard disk show up very quickly at the top of the list, then images from Office's online content will show up in the pane. The first image is installed onto your computer by both Office 2007 and 2010. - Click on the first image at the top left, a drawing of a
globe and a suitcase.
The image appears in your document at the location of the cursor, which was on the blank line after the title.
 Problem:
The image of the globe and suitcase is not in the pane.
Problem:
The image of the globe and suitcase is not in the pane.
This image should definitely be there. It is one of the images that Office puts on your hard disk in a normal installation.
Solution 1: Check your typing in the search box. Correct errors and search again.
Solution 2: The image may be in the online collection. Make sure the check box is checked to include Microsoft.com online content. Scroll in the pane until you find the image.
Solution 3: If this particular image is no longer available online and it is not showing in the pane, use another luggage image. Check with your instructor first. She might have a preference! Default
text wrapping for pasted image:
Default
text wrapping for pasted image:
The default for most images is to be pasted "inline" with the text, just like another word. AutoShape images that are pasted from the Clip Art pane, however, float over the text instead. Unexpected and confusing! -
 Save.
Save.
[flyer-World Travel Inc-Lastname-Firstname.docx]
BAD LINK in pane: The link at the bottom of the Clip Art pane "Find more at Office.com" used to open a web site where you could select images and download them all at once. All you get is now is a page with short explanations for inserting clip art from Office 2013, Office Online (formerly called Office Web Apps), and Bing.

 Word 2013, 2016: Search for Image with Online Pictures
Office 2013 and 2016 do not install any images on your hard drive and do not have a Clip Art Organizer like Office 2007 and 2010.
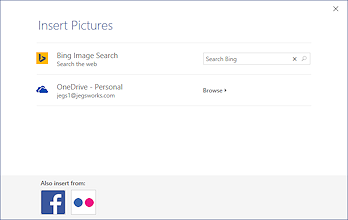
The Online Pictures button on the Insert ribbon tab opens a dialog where you can select where to get the image. You can search the whole web using Bing for images that are in public domain or are licensed under Creative Commons or you can choose to show 'All Images'. Or you can choose to browse your OneDrive images. You can also connect your Facebook account or Flickr account to this dialog so that you can browse those images from inside the dialog. You can only search Bing Image Search from this dialog.
You must have an Internet connection to search online locations!
Update January, 2015: Microsoft has shut down ![]() its online images through Office.com! The Online Pictures dialog in Office 2013 and 2016 programs no longer shows a search box for Office.com, just for Bing and your OneDrive.
its online images through Office.com! The Online Pictures dialog in Office 2013 and 2016 programs no longer shows a search box for Office.com, just for Bing and your OneDrive.
Update February, 2016: The dialog now lets you filter Bing search results by Size, Type, or Color. In the search box you can choose to show 'All Images' instead of the default "CC Only', which shows only images released under Creative Common license.
![]() Problem: Cannot go online
Problem: Cannot go online
Solution: Use any image that you have available. It would be nice if the image had a transparent background.
 Click on line 3 of your document, which is
blank.
Click on line 3 of your document, which is
blank.
The cursor is now in that line. You will put an image on this line. This is why we saved one blank line earlier.- On the Insert ribbon tab click the Online Pictures button
 .
.
A dialog opens for you to select where to look for a picture. With Bing Image Search you can enter keywords to use for your search. - Experiment: Finding images
- Enter a keyword of your choice, like dog or automobile, in Bing Image Search and press the ENTER key.
The dialog changes to show the results. - Add the word photo to the search terms and press ENTER.
Do your results show only photographs? - Replace photo with the word cartoon and search again.
Do your results show drawings/cartoons?
- Try adding the word(s) illustration or clip art.
Were any of the results of these choices exactly the same? - Try the same searches after clicking 'Show all web results'.
- Close the dialog and open it again by clicking the Online Pictures button on the Insert ribbon tab.
- Try searching with multiple search words.
Can you restrict the results this way or do you get lots of images that are not what you expected?
When you are ready to continue...
- Enter a keyword of your choice, like dog or automobile, in Bing Image Search and press the ENTER key.
-
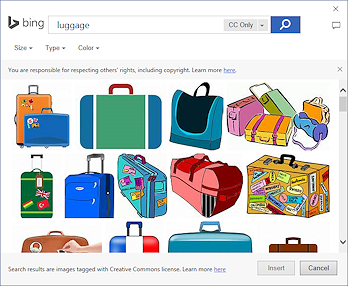 Type luggage public domain in the text box for Bing Image Search and press the ENTER key.
The dialog changes to show images from the web that are labeled as public domain.
-
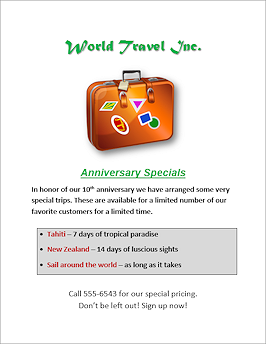
 Select the brown suitcase used in the illustration at the right, or, if it is not there, try searching for suitcase public domain.
If necessary, pick a similar drawing of a suitcase (not a photo).Alternate method: Search online
Open your browser to Google or Bing and search with the same key words. You might find the image that used to come with Word.
Save the image you want to your hard disk. Check for whether the image is free for use or has restrictions! Then use the Pictures button instead of the Online Pictures. Navigate to where you saved the image to select it.
- Click the Insert button.
The drawing appears in your document on the line where the cursor was. That is why we left a blank link between the title and subtitle. -
Save.
[flyer-World Travel Inc-Lastname-Firstname.docx]
Format an Image: Ribbon
The Picture Tools: Format tab has MANY tools to adjust the look of your image. Some tools may not apply to your particular type of image. You can recolor an image (the whole image to one color), change the brightness and contrast, put a frame around it, create a drop shadow, control where the image falls on the page and how text wraps around it (or doesn't!), and more.
-
 If
necessary, select the image in the document by clicking on it.
If
necessary, select the image in the document by clicking on it.
Handles appear at the corners and in the middle of each side. The handles are the easiest way to tell that the image is selected.The green circle at the top is a rotation handle. Yes, you can rotate any image to any angle.
Word 2013, 2016: A smart button appears for Layout Options.The ribbon changes to show the Picture Tools - Format tab. Another clue that an image is selected!

- Hover over each of the tools on the Picture Tools: Format ribbon to see the
ScreenTip that tells what
it does.
- Experiment: Picture Tools - Format tab
Take a few moments to try out some of the cool tools that you can use on images. Live Preview will show the effects of some of these as you hover, but not all.
When you are ready to continue, be sure you have undone all of your actions.Undo/Redo: Remember that you can
repeatedly use the Undo button  on the Quick Access Toolbar.
Or, use the key combo CTRL + Z to back up to where you started.
If you back up too far, CTRL + Y or the Redo button  can save you.
-
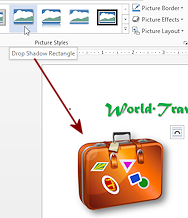 Click in the Picture Styles group on Drop Shadow Rectangle to
apply it.
Click in the Picture Styles group on Drop Shadow Rectangle to
apply it.
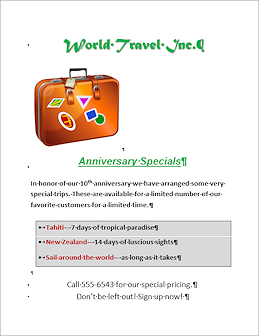
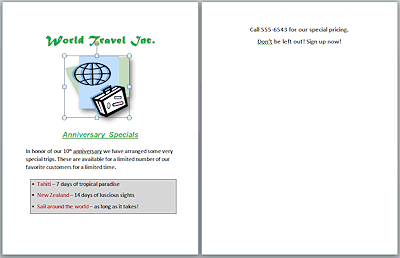
The image now has a drop shadow. Is it a shadow for the picture as a whole or is it a shadow of the object itself? That depends on whether the image has a transparent background, or not.The images used in these illustrations had a transparent background.
If your image looks odd with this choice of picture style, pick a different image or a different picture style. Later you will find out how to make the background transparent. Unhappily, that does not work well for all images.
Next you need to center the image on the page. The Center button in on the Home tab and right now the Picture Tools tab is up. Can we get to Center on the Mini-Toolbar? We can but try!
-
Save.
[flyer-World Travel Inc-Lastname-Firstname.docx]
Format Image: Mini-Toolbar and Context Menu
-
 While
the image is selected, right click on the image to get
the context menu.
While
the image is selected, right click on the image to get
the context menu.
Word
2007: No Mini-Toolbar.
Word 2010, 2013, 2016: Shows a Mini-Toolbar.Hmmm. The context menu and Mini-Toolbar (Word 2010) are both quite different from what you saw when you right clicked on text! There is no Center command in either one. That's because Center is a paragraph command!
-
Experiment: Context Menu and Mini-Toolbar for Image
Hover over the buttons on the Mini-Toolbar to see the ScreenTip about what they do.
Try out the menu commands, too.Crop means to chop off parts of the image.
Bring Forward and Send Backward are useful when you have several images and/or other objects that overlap. You can fix the whole stack exactly as you want.
Group combines two or more selected objects and treats them as a single object. This is how you can put several AutoShapes together to make a single drawing.Undo your changes.
When you are finished...
 While
the image is selected, click on the Home tab and then
the Center button
While
the image is selected, click on the Home tab and then
the Center button  or use the key combo CTRL + E.
The paragraph that holds the image is centered, carrying the image along with it.-
Save.
[flyer-World Travel Inc-Lastname-Firstname.docx]
Format Image: Resize by Dragging
![]() If you enlarge any image beyond the size it was originally created, it may look jagged. Vector format images change size more smoothly than bitmaps.
If you enlarge any image beyond the size it was originally created, it may look jagged. Vector format images change size more smoothly than bitmaps.
- Move your pointer to the bottom right corner handle until it changes to the Diagonal Resize shape.
 Change
size and keep proportions: Dragging with a corner handle changes the width and height at the same time without changing the proportions of the image.Rotation handle: The green circle above the middle of the top edge of the image is a rotation handle. Move the mouse pointer over it until the mouse pointer shape changes to a curved line
Change
size and keep proportions: Dragging with a corner handle changes the width and height at the same time without changing the proportions of the image.Rotation handle: The green circle above the middle of the top edge of the image is a rotation handle. Move the mouse pointer over it until the mouse pointer shape changes to a curved line  and then drag. The whole image rotates.
-
Drag to the lower right to enlarge the image and release the mouse.
The mouse pointer is the precise select shape + while you are dragging.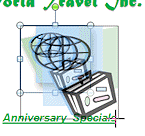 Word 2007, 2010: As you drag, a transparent version
of the image shows on top of the original to show what the new size will be.
Word 2007, 2010: As you drag, a transparent version
of the image shows on top of the original to show what the new size will be.
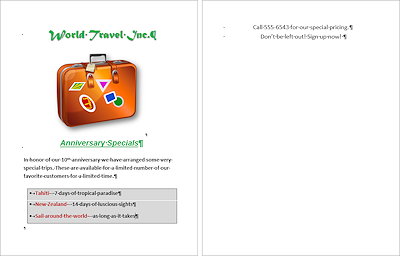
When you let go, the image re-centers because the paragraph is centered. Word 2013, 2016: The image resizes and recenters as you drag.
 If necessary, drag again until the image is
not quite as
wide as the subtitle "Anniversary Specials".
If necessary, drag again until the image is
not quite as
wide as the subtitle "Anniversary Specials".
You may need several tries to get the size right. That's normal. To reduce the size, just drag the bottom right corner handle up and to the left.
Some text moves over a new page. Hmmm. That's not good for a flyer. We will have to fix that!
- Click in the document to deselect the image.
-
 Save.
Save.
[flyer-World Travel Inc-Lastname-Firstname.docx]
Adjust to One Page
You now have a situation to deal with. Your text has moved onto a second page and your flyer must use just one page.
Possible Adjustments:
-
Change page margins.
-
Delete blank lines somewhere.
-
Reduce font size for blank lines to reduce their height.
-
Reduce the font size of some lines of text.
-
Change the Space Before and/or Space After for one or more paragraphs
-
Change the line spacing.
-
Delete some text.
-
Resize image(s).
- Click in the line of text that has the phone number in
it.
-
Look at the Style pane or the Styles gallery on the Home tab.
What style is selected? It's Heading 2, even though you changed some of the formatting.Problem:
Heading 2 does not show in the ribbon
Solution: Click the More button at the right of the Styles group to see more styles or widen your window to show more styles on the ribbon.
- Click in the other line on the second page
and check what its style is.
Both are Heading 2.
Word is trying to keep these paragraphs together because of their styles.
- Click in the subtitle, Anniversary Specials.
-
Change the line spacing from Double to 1.5.
Did the wandering sentences reappear? If so, you are back to a one-page flyer.
 Problem: Document
is still not one page.
Problem: Document
is still not one page.
Your image is probably a bit too large.
Solution: Click on the image to select it and then resize it by dragging the bottom right handle up and to the left a little bit at a time until the final lines appear on the page.
- Save.
[flyer-World Travel Inc-Lastname-Firstname.docx]
We will not print just yet. We are not through with this flyer!
| © 1997-2018 Jan Smith All Rights Reserved |
Site Map What's New |
Privacy Policy Terms of Service Copyright Acknowledgements |
~~ 1 Cor. 10:31 ...whatever you do, do it all for the glory of God. ~~
Last updated: September 23, 2018
Update January, 2015: Microsoft has shut down its online images through Office.com! The Clip Art pane will not show Office.com content any more, only Bing search results for images under Creative Commons licensing.