Forms & Reports:
Form Wizard

Did you want: Working with Databases: Access 2007, 2010, 2013, 2016
Forms & Reports: |
Did you want: Working with Databases: Access 2007, 2010, 2013, 2016 | |||||
|
| ||||||
|
Most of your forms will be used for entering and editing records. In Access Basics you learned how to use AutoForm to quickly create a form which got the job done, but it was boring and put all controls into a single column. This is an acceptable design only for short forms! Methods to Create a Form:
You already used an AutoForm in Project 2: Access Basics. An AutoForm can use only one table or query. In this lesson you will learn how to create a form using the Form Wizard, which walks you through a set of choices. The Form Wizard lets you choose fields from more than one table or query. Then you will customize the form. You can even save your changes as a new AutoFormat style. Sweet! |
Project 4: Forms & Reports
| |||||||||||||||||||
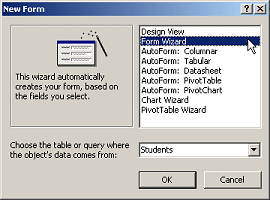
Form By WizardThe Form Wizard walks you through the choices you need to make to create a simple form. Methods to start the Form Wizard:
Steps in the Form Wizard:
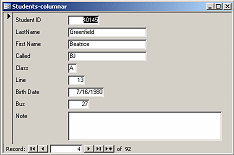
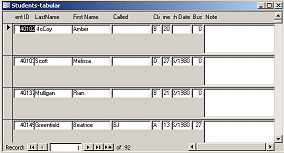
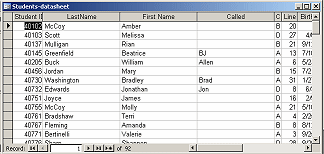
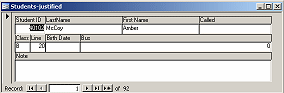
Form Wizard: LayoutsIn the Form Wizard you are offered 6 different layouts. Some are useful only for special situations. You cannot create your own layouts to add to this list.
Form Wizard: AutoFormat StylesAccess comes with 10 pre-designed formatting styles. These can be applied from the Form Wizard or later from the AutoFormat dialog. (Format | AutoFormat...) After applying a style you can, of course, modify the form as you wish. You can even use the AutoFormat dialog to save your new style with a new name (a GOOD idea) or overwrite an existing name (NOT recommended!!) An AutoFormat style includes formatting for the Form header/footer, Page header/footer, Detail section, controls and labels. You can customize the background, font size, font color, borders, shadows or other special effects, and you can add decorative images (which will appear with every record). AutoFormat will squeeze all of the fields into a small space. You may have to do a LOT of resizing and rearranging to make your controls comfortable to work with.
If you delete or overwrite a standard
AutoFormat style, it is not obvious how to get it back.
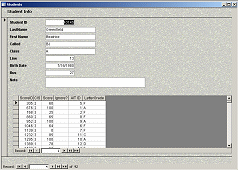
Start with:
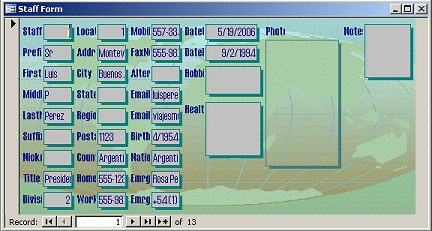
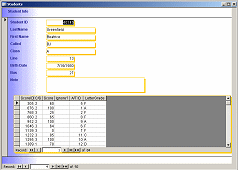
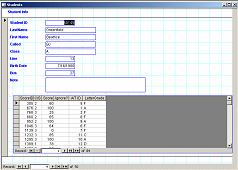
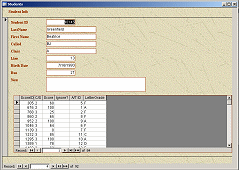
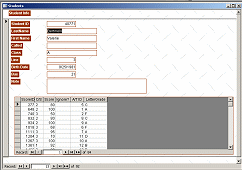
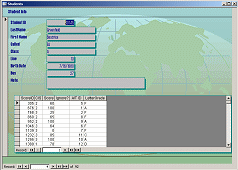
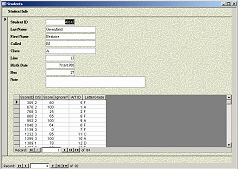
It's small and cramped. Many of the fields are not wide enough to show the data in them. Many of the labels are cutoff, too. There is no title. This is a start, but it needs a LOT of work! (And thus we see why we need the next lesson!) | ||||||||||||||||||||
|
|
~~ 1 Cor. 10:31 ...whatever you do, do it all for the glory of God. ~~ |
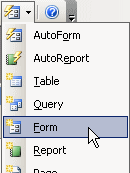 Toolbar button:
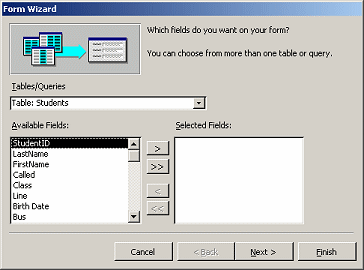
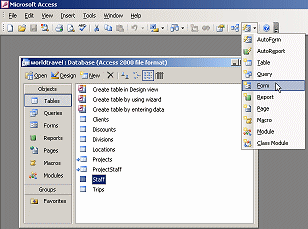 In
the Database Window, select the table
In
the Database Window, select the table 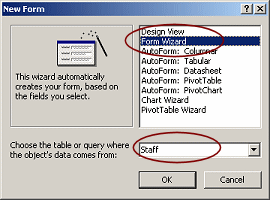 Click
on Form Wizard and then on OK.
Click
on Form Wizard and then on OK. 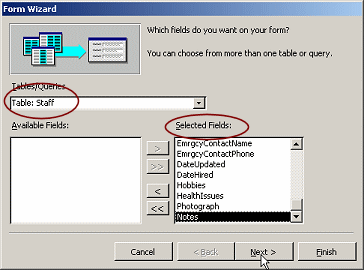 Click
on the button >> to move all fields to the list of fields to
include in the form.
Click
on the button >> to move all fields to the list of fields to
include in the form.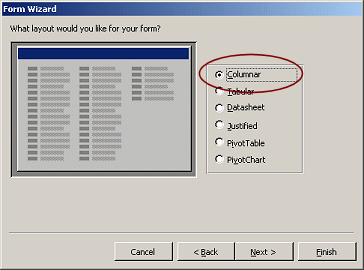 Select
Columnar as the layout and click on Next.
Select
Columnar as the layout and click on Next.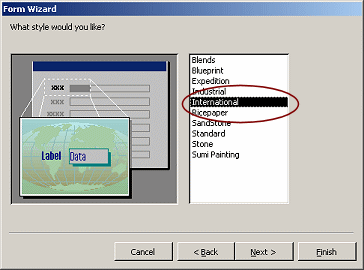 Select
the AutoFormat named International and click on
Next.
Select
the AutoFormat named International and click on
Next.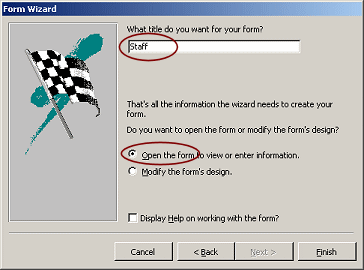 Keep
the default choices, title for the form is Staff and "Open the form to
view or enter information."
Keep
the default choices, title for the form is Staff and "Open the form to
view or enter information."